 Call Now
 Get In Touch

A dry, well-insulated attic is one of the most effective, lowest-stress ways to protect your roof, stop ice dams, and reduce heating and cooling costs. In the Portland metro, where wet winters and mild summers meet older homes and heavy tree cover, small attic problems quickly become big, expensive ones. This guide walks you through what to check, what upgrades actually help, and a practical sequence you can use before calling a contractor.
Why attic ventilation and insulation matter
-
Moisture control: Warm, moist air from the living space will condense on cold attic surfaces. Over time that moisture causes rot, mold, and degraded insulation.
-
Ice dam prevention: In winter, heat leaking into the attic can melt snow on the roof; the meltwater runs down and refreezes at cold eaves, forming ice dams that back up under shingles. Balanced ventilation and continuous insulation reduce this cycle.
-
Energy efficiency: Proper insulation reduces heat loss in winter and heat gain in summer, lowering energy bills and keeping interiors more comfortable.
-
Roof longevity: A dry, ventilated roof deck limits wood rot and shingle deterioration — protecting warranties and extending service life.
Quick homeowner checklist (start here)
-
Inspect the attic for visible daylight at the roof plane (indicates holes) and for wet or dark insulation.
-
Confirm soffit/soffit-baffle pathways are clear of insulation so intake air can flow.
-
Look for signs of roof leaks, mold, or staining on rafters and sheathing.
-
Check attic vents (ridge, gable, turbine, soffit) for blockages and physical damage.
-
If your home is older or has been remodeled, note where recessed lights, bathroom vents, and kitchen vents terminate — many improperly vent into attics.
What “balanced” ventilation means (in plain language)
The attic works best when there’s a pathway for fresh air to enter low (soffit/intake) and a place for warm, moist air to exit high (ridge, roof, or gable vents). That steady exchange keeps the roof deck near outside temperature in winter and prevents trapped moisture year-round.
Key elements:
-
Intake open at the eaves/soffits (not blocked by insulation).
-
Exhaust at or near the ridge (ridge vents are the most effective continuous exhaust on modern roofs).
-
Unobstructed channels (baffles) in rafter bays to move intake air up under the roof deck.
If intake is blocked or missing, cool air cannot enter and the system stops working — even if you have a ridge vent.
Common attic problems and how to spot them
-
Condensation on rafters or sheathing: feel around for dampness after a cold night.
-
Mold, dark staining, or rot on wood members: visual check during daylight entry.
-
Insulation piled against the soffit with no baffles: indicates intake is blocked.
-
Daylight visible through the roof: holes mean heat loss and moisture entry.
-
Vents plugged with debris or bird nests: reduces airflow and defeats the system.
If you see any of these, take photos and make a prioritized list — it’s helpful to show a contractor.
Practical upgrade sequence (don’t skip steps)
-
Air-seal the living space first. Seal attic bypasses where warm, moist air leaks into the attic: attic hatches, recessed light housings (IC-rated fixtures), plumbing stacks, top plates, chimneys, and duct boots. Small gaps add up to gallons of moisture per day.
-
Ensure continuous soffit intake. Install or restore baffles so insulation never blocks the air path from soffit to the roof cavity.
-
Provide high exhaust near the ridge. Install a continuous ridge vent (or equivalent) and ensure it’s matched to intake area. Ridge vent plus continuous soffit intake is a reliable modern approach.
-
Upgrade insulation at the ceiling plane. Add insulation to achieve current recommendations for your climate (check local code or an energy auditor for the target R-value). Focus on a continuous thermal layer with minimal gaps.
-
Address vent terminations: Make sure bathroom and kitchen fans discharge outside (not into the attic). If they currently vent into the attic, reroute them properly.
-
Inspect and repair roof penetrations and flashing while access is open — fix any leaks, nail pops, or compromised flashing at the same time.
Doing air-sealing first is crucial — insulation without air sealing can trap moist air against the roof deck and make problems worse.
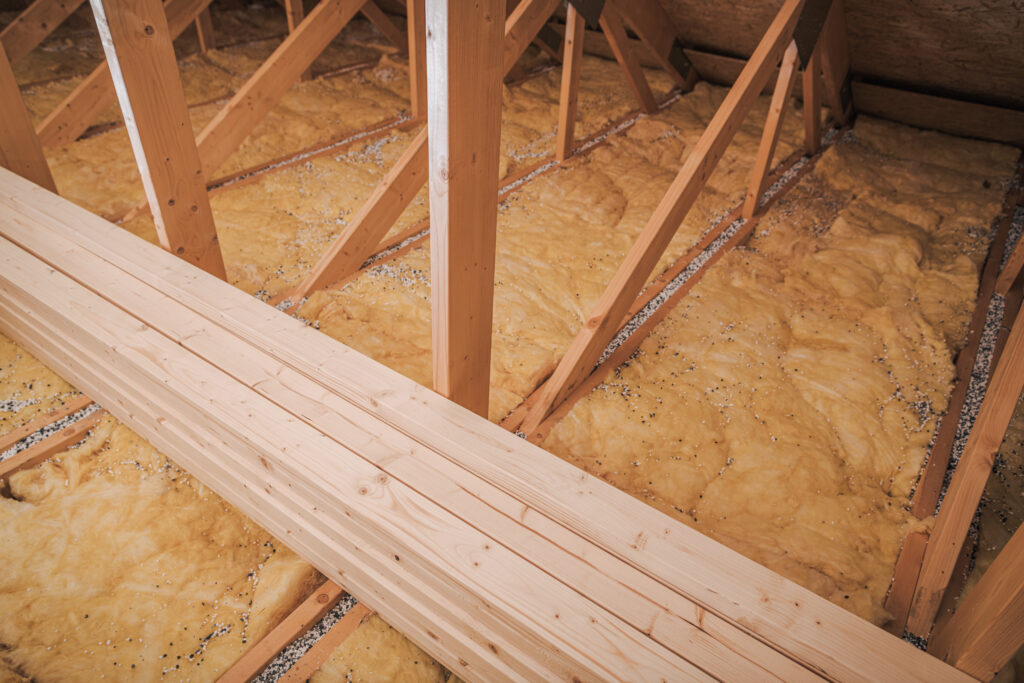
Attic insulation: what matters most
-
Depth & continuity: It’s less about a single product and more about ensuring a continuous layer with no thermal bridges.
-
Layering strategy: Where possible, add a dense-pack or blown-in layer over existing batt insulation to fill gaps.
-
Compression issues: Don’t compress batt insulation in cavities — compressed insulation loses performance.
-
Vent channels: Keep a 1–2″ ventilation channel (via baffles) above insulation at soffits so intake air flows freely.
-
Vapor control: In many PNW homes, focus on air sealing more than vapor barriers; consult a pro for the right approach for your house assembly.
Vent types — pros & cons (quick)
-
Ridge vents: Continuous, low-profile exhaust; best when paired with continuous soffit intake.
-
Soffit vents: Intake locations; must be clear of insulation and supported by baffles.
-
Gable vents: Can work for smaller attics but often provide short-circuiting flows and less effective ventilation unless paired well with inlet/outlet strategy.
-
Turbine / powered vents: Turbines can help, but powered vents must be sized and controlled properly to avoid pulling conditioned air from living spaces; they also use moving parts that need maintenance.
When to call a pro (and what to ask)
Call a qualified contractor or energy auditor in Gresham if you notice moisture staining, persistent ice dams, visible mold, or you’re planning a major insulation upgrade. Ask them to:
-
Perform a blower-door and infrared inspection (if possible) to locate air leaks and cold spots.
-
Produce a prioritized work plan that lists air sealing items, required ventilation fixes, and insulation options.
-
Explain how they will preserve soffit intake and how they’ll document before/after conditions.
-
Confirm whether any electrical, mechanical, or structural trades are required.
Simple DIY fixes you can do safely
-
Install or replace attic hatch weatherstripping and add an insulated cover (attic tent).
-
Remove loose debris and stored items from the attic floor to allow inspection and airflow.
-
Add simple rafter-bay baffles where you can (available at most home centers) to keep soffit pathways clear.
-
Make a list of obvious attic penetrations (recessed lights, top plates, piping) and seal obvious gaps with caulk or low expansion foam — but avoid spraying over complex electrical boxes; consult an electrician if unsure.
FAQ
Q: Will more ventilation always fix condensation?
A: No — ventilation helps, but the most effective fix is controlling air leaks from the living space. Ventilation without air sealing can mask problems but won’t solve moisture sources.
Q: How do I know if my home has enough insulation?
A: A pro can measure current R-value; a rule of thumb is if your insulation is shallow or you can see the ceiling joists, you likely need more. An energy audit provides precise recommendations.
Q: Are powered attic fans a good idea?
A: Typically not recommended as a first choice. They can depressurize the attic and pull conditioned air up from the living space unless installed with careful controls and makeup air strategies.
Q: Will attic work help with winter ice dams?
A: Yes — continuous insulation, good air sealing, and balanced ventilation reduce the temperature differential that causes ice dams. In the PNW, addressing insulation and ventilation is often the most cost-effective strategy.
Local note for Portland-area homeowners
If you live in Portland, Gresham, Beaverton, or nearby, seasonal moisture and trees increase the importance of a well-executed attic strategy. Blue Moon Roofing & Gutters (based in Gresham) offers attic health checks that document ventilation pathways, insulation depth, and any active moisture issues — with photo documentation and a recommended work plan if upgrades are needed. Call (503) 825-2583 to schedule an inspection.
A properly sealed and insulated attic protects your roof, lowers bills, prevents costly moisture repairs, and improves comfort. Start with air sealing and intake/exhaust checks, then add insulation in a way that preserves airflow. If you want, I can draft a short attic inspection checklist PDF you can use when walking your attic with a contractor.